If you’ve spent any time looking at your backyard and feeling like that sturdy metal fence is a bit too “industrial” for a relaxing stay in the garden, welcome to the club.
That’s actually one of the first few things our founders noticed in their own yard before they decided to dip their toes into starting an artificial plant business.
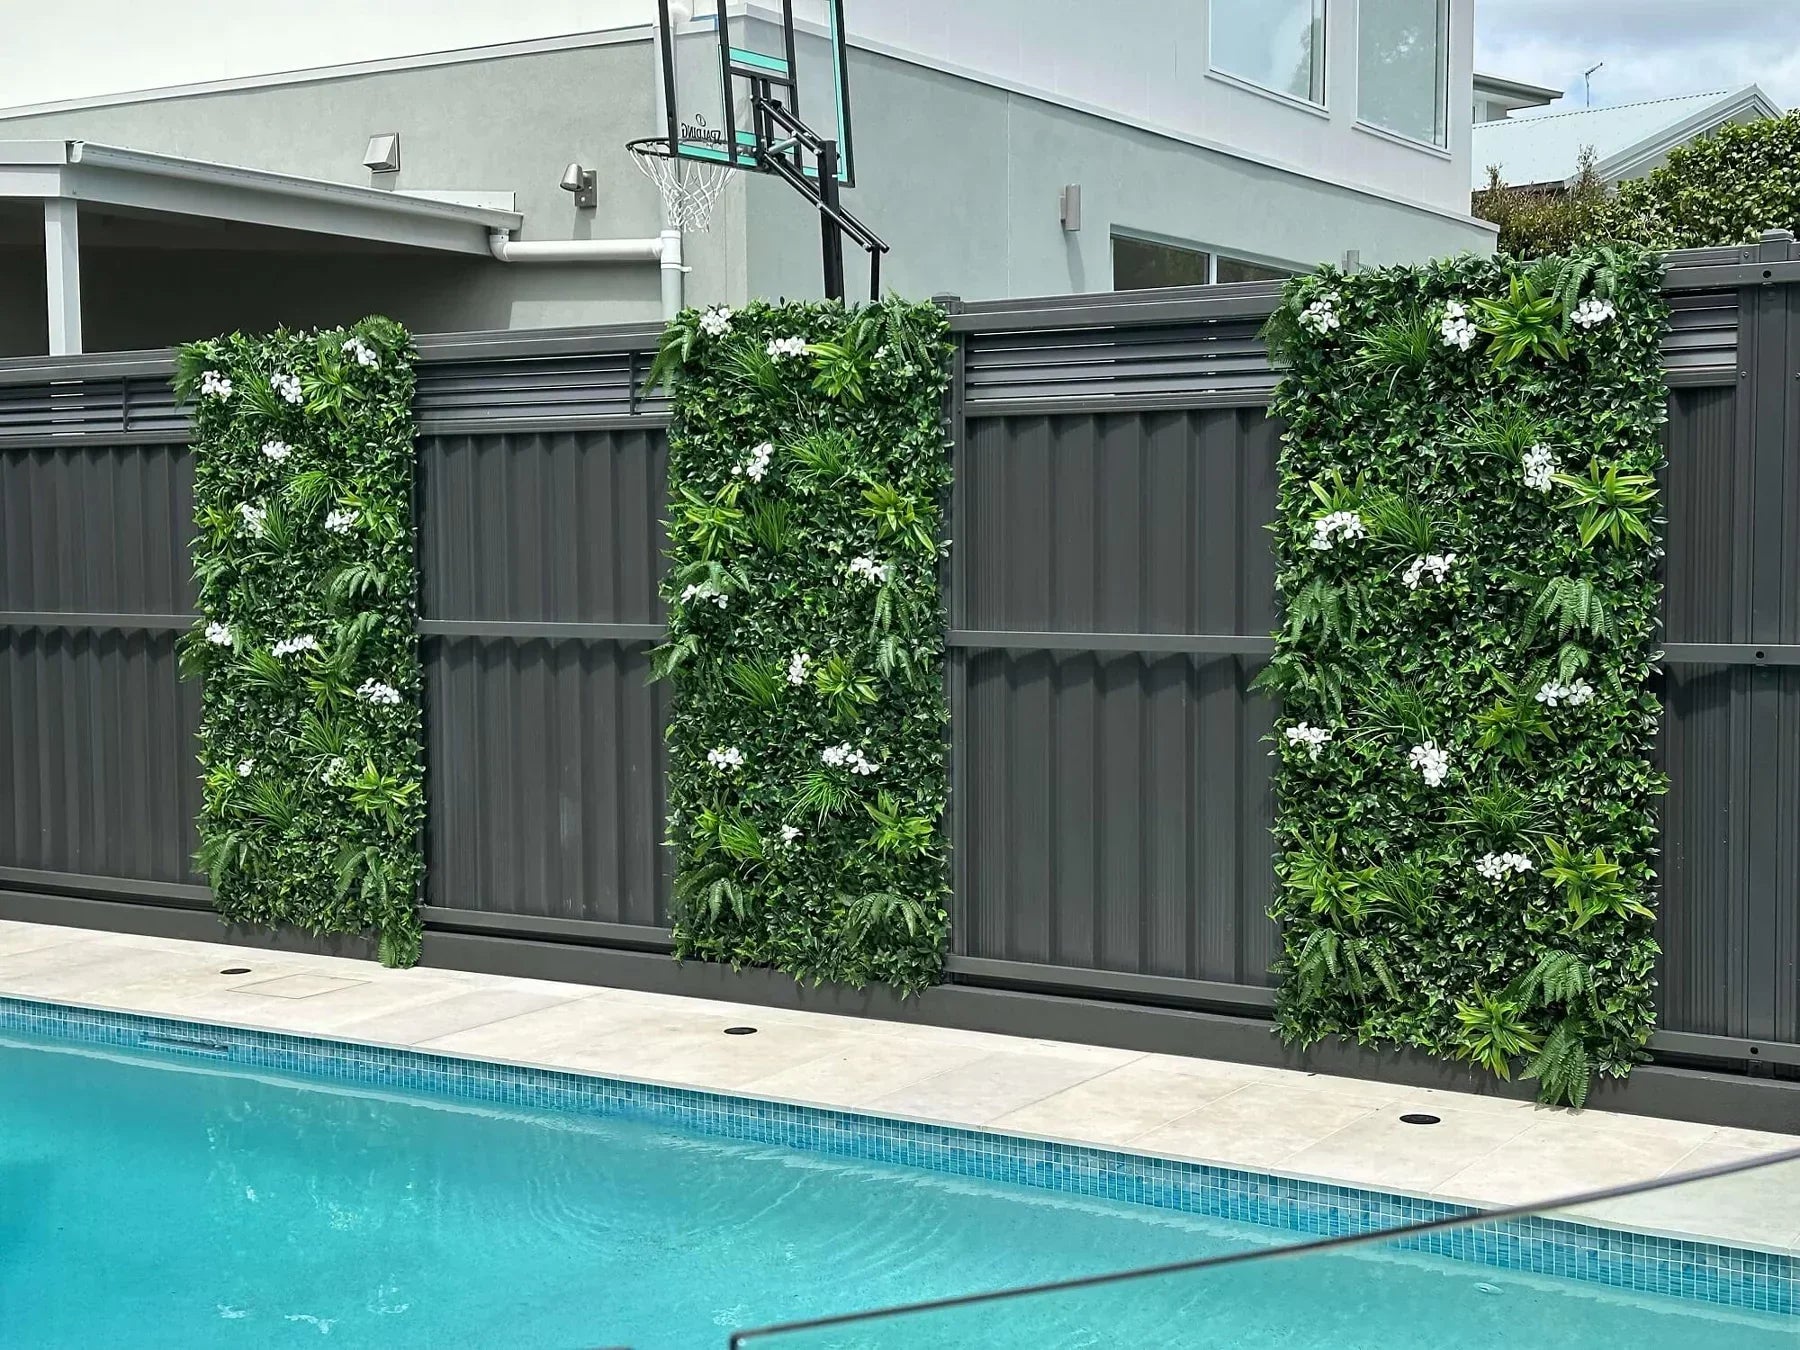
They realized that while they chose steel for their home because it’s tough, built to last, and low-maintenance, it’s not the most inviting thing to look at.
But the good news is that, because metal is so stable and rigid, it’s the perfect canvas for an artificial green wall installation. The transition is easier than you think, because you don’t need to replace your fence or wait years for real greenery to grow.
You just need to rethink the surface you already have.
Here, we’ll help you bridge the gap between industrial durability and aesthetic beauty by showing you the most effective way to mount a fake plant wall onto your existing metal structure.
Ready to learn more?
Let’s get into it.
Why Metal Is Good for Artificial Green Walls

Metal is a fantastic foundation for a fake plant wall.
The reason a metal surface is good for an artificial green wall installation is because of its sheer reliability. Unlike timber, which can warp, swell, or even rot, metal remains stable regardless of the environment.
When learning how to install artificial green wall panels, you’ll find that the rigidity of steel provides a level of security that other materials just can’t match. As a surface, it won’t move, bend, or decay behind the foliage - a true set-it-and-forget-it substrate.
In the end, you’ll have a high-end look in your yard without ever compromising the structural integrity of your property.
Understanding Your Surface: Metal, Steel, and Corrugated Metal
Before you grab your drill and get to work, it’s worth taking a second to look at what your fence is actually made of so that you’ll know how to approach your artificial green wall installation best.
In home improvement, we use these terms interchangeably, but knowing the slight differences can help you feel more confident during the process.
If you’re planning a DIY project (which we always love to see), you’ll need to know exactly what you’re drilling into to get the “one-and-done” result you want.
Metal (steel vs aluminum)

People talk about metal fences as a broad category. In reality, most residential metal genes are either made of steel or aluminum.
If your fence feels heavy and rock-solid, it’s likely steel, which is the perfect “anchor” for a fake plant wall. Aluminum, on the other hand, is lighter and naturally rust-proof, but it’s also softer to drill into.
Regardless of which one you have, the process of how to install artificial green wall panels is largely the same - you’re working with a non-porous, sturdy surface that provides a great home for your fauxliege.
Corrugated metal

If your fence has waves or ridges, it’s corrugated metal. This isn’t actually a different material, i.e., it’s usually just a sheet of galvanized steel that’s been pressed into a ribbed pattern.
The beauty of corrugated metal is its strength in that those ridges act like a backbone and make the sheets more rigid. With an artificial living wall, having a corrugated metal fence is a bit of a cheat code.
The valleys between the ridges provide a natural pocket of airflow behind the panels, while the peaks give you a consistent point to drive your screws.
Pre-Installation: Tools, Materials, and Preparation
Before you start your installation, we recommend getting your workspace ready.
Since you’re dealing with metal, you need to be intentional with your kit, in that your tools need to bite into the surface effectively.
Here’s what you’ll need to have on hand:
-
Your panels: Depending on the size of your space, it’s always a good idea to lay them out on the floor first to see how they’ll connect before they go up on the fence.
-
Drill & head bit: A standard cordless power drill will do the trick perfectly, as long as you make sure the head is in good condition so it doesn’t slip or strip the screws.
-
Metal screws & washers: You’ll want self-tapping screws (which have a little drill-bit tip) so you don’t have to pre-drill holes. The washers will act as a stopper to ensure the screw head doesn’t pull right through the plastic mesh on the panel.
-
Sharp scissors: High-quality scissors or heavy-duty shears are great for trimming the edges of the mesh backing so that your faux green wall fits into every corner.
Check out how you can best prepare for your faux green wall installation by following this measuring tutorial from one of our founders, Georgina:
Expert tips
Before you drive that first screw, check the stability of your fence. If you’re working with an older metal fence that feels a bit wobbly in the wind, add a few vertical supports or bracing poles to stabilize it. Most solid steel or corrugated fences are strong enough to handle the weight, but it’s always good to ensure the foundation is as well.
On average, budget about 20 to 30 minutes per panel. This includes the time it takes to align the panel, snap the clips together, and drive screws.
And while you can certainly tackle this solo, this is a job where a second set of hands pays off. Having another person hold the weight of the panel and check the level from a distance will speed up the process significantly.
Step-by-Step Installation Guide
Your tools are ready, you’re excited, there’s only one thing left to do. Well, 5 things, to be more specific.
Installing an artificial green wall on metal is a simple process, but it’s always best to follow an expert guide to make sure you don’t miss anything.
Step 1
Begin at the top corner of your fence. Have a friend hold the first panel against the metal while you align it with the top edge. Don’t rush this step, as it’s crucial to set a perfectly level starting point to ensure your “horizon line” stays straight across the length of the fence.
Step 2
Using your drill, drive a metal screw and washer through the panel’s mesh backing and into the fence. To keep the fake plant wall taut and secure against wind, place a screw every 10”. If you’re working with corrugated metal, aim for the peaks of the ridges to get a secure grip. Don’t forget the washer - it’s essential to prevent the screw head from pulling through the plastic grid.
Step 3
Take your second panel and align it with the first. Use the built-in clips and lugs along the edges to snap the two panels together. To ensure a seamless joint, clip them first and see what they look like on the floor. Once they’re connected, repeat Step 2 by securing the new panel to the fence with the screws and washers.
Step 4
Once your top row is complete, begin moving downward. Clip the top of your new panels into the bottom of the installed row. Continue clipping and connecting to the fence until the desired surface is fully covered.
Step 5
With the panels in place, grab your sharp scissors to handle any overlap. Trim away the excess mesh backing at the bottom or sides to match the exact dimensions of your fences. Finally, give the foliage a quick ruffle with your hands to blend the edges, and your installation is complete.
Finishing Thoughts

At the end of the day, your backyard should be a place where you want to spend time, not a space that feels cold or unfinished.
A simple change like swapping a harsh steel view for a lush, evergreen backdrop can shift how you feel when you step outside.
Follow these steps and choose the right tools for the job so that you’re not just covering up a fence, but creating a new aesthetic for your backyard that will stay fresh all year round.
The beauty of a fake plant wall is that once the work is done, the maintenance is over. You’ve done the hard work of the artificial green wall installation, and now all that’s left to do is pull up a chair, relax, and enjoy the view.
If you need more help for your project, book a free consultation with our expert team, and let’s make your space one for the books.
FAQ
Can the panels be cut easily?
Yes, you can use sharp scissors to cut your panels along their backing to connect them easily to other panels and cover the surface seamlessly.
Do artificial vertical garden panels join together?
Yes, all faux green walls in the Designer Plants collection have lugs and clips along the sides that allow them to easily connect.