
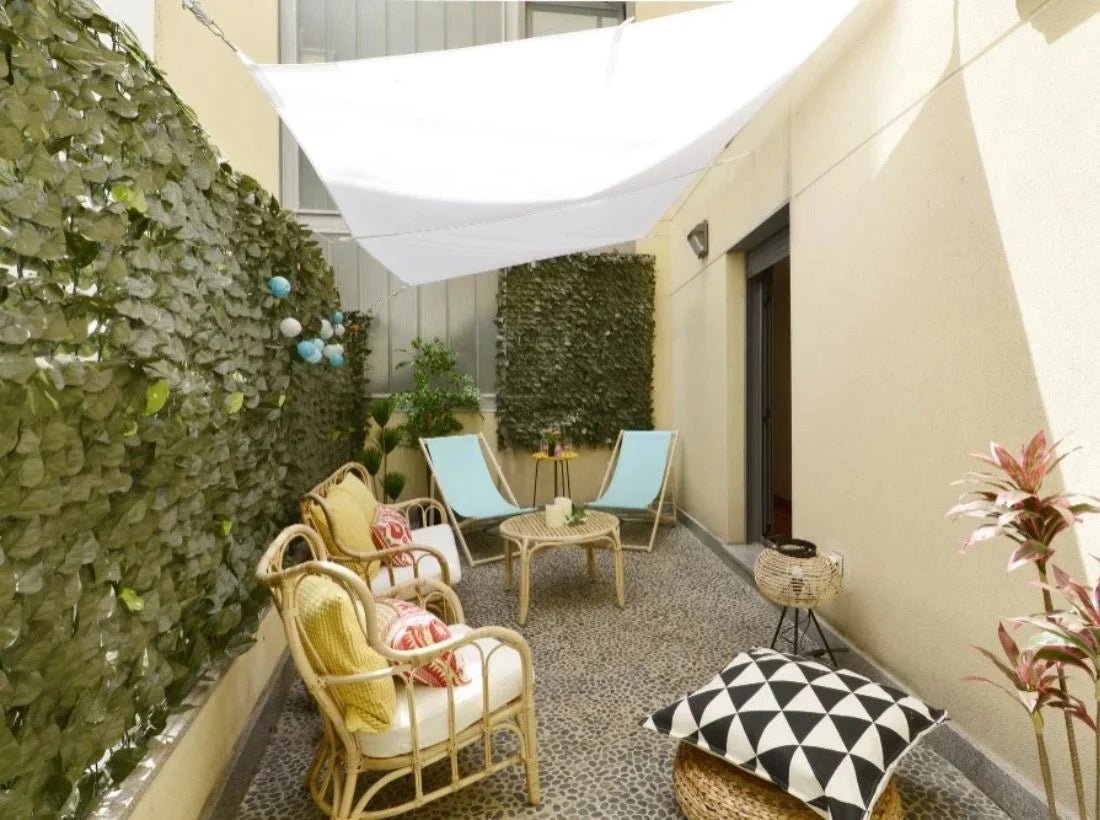
A balcony green wall (even an artificial one) turns a bare railing into a private, leafy retreat. It also puts your faux greenery in the most exposed spot of your home. Wind picks up with every floor, and on the coast it arrives with salt and strong sun.
A green wall for balcony use only works when it stays secured to your railing through gusts, storms, and years of sun. At Designer Plants, we’ve supplied premium artificial greenery since 2005, and we’d like to show exactly how we fix panels to each railing type, where balcony installs can fail in the wind, and how we prevent it.
Let’s get into it.
Why Wind Decides Every Balcony Green Wall
Wind speed rises with height. The National Weather Service notes that hurricane winds strengthen as you move up from the ground, which is why the upper floors of high-rise buildings take the worst of it. On an ordinary breezy day, a 25th-floor balcony sees harder gusts than a ground-floor patio, and that's not only during a hurricane.
Railings also carry pressure. STRUCTURE magazine's wind FAQ explains that engineers treat the railing on a balcony 6 feet deep or less much like the windward wall of the building.
Every panel you add catches that pressure, so we treat a balcony green wall as a small piece of façade rather than just a simple decoration.
As a result, 3 things decide whether your faux green wall panel holds: how many fixing points you use, what those fixings bite into, and whether the hardware survives salt and sun. The rest builds around those.
What to Know Before Buying a Balcony Green Wall
If there’s one thing we can tell you with certainty, it’s that a few minutes of prep can save a failed artificial green wall install.
Before you order your desired artificial vertical garden panels, work through this list so that you have all the facts:
-
Identify your railing type: Mesh, tubular, solid metal, timber, concrete or masonry, and glass each need a different fixing.
-
Ask your building first: If you’re renting (or even if you’re a homeowner in some cases), boards and landlords can limit what you attach to railings, so confirm the rules before you drill.
-
Measure the run: Multiply length by height to get square feet, then use our artificial green wall panel coverage calculator to work out how many panels you need. Mark the start and end points on the railing so the layout stays straight.
-
Keep access clear: Leave doors, outlets, and any access points free.
-
Stay away from flames: Keep panels away from grills and open flames. Even fire-tested materials should not sit near a flame, and if your building requires fire-rated greenery, browse our fire-resistant artificial plants.
Which Fixing Methods Should You Use by Railing Type?
Contrary to popular belief, you don’t need specialist tools to do a DIY installation for an artificial green wall. In fact, many balcony installs take a drill, screws, cable ties, and scissors, all available from our installation parts and fixings page or any hardware store.
Here’s what you need for each railing type:
Mesh, tubular, and cyclone-style railings
UV-resistant cable ties give you the fastest balcony install you can hope for. If your railing has wide gaps, add sheets of mesh with a 2-inch cross and secure them with fencing brackets first, so the panels have a continuous surface to grip.
Then push a cable tie through the panel, loop it back through the tie head, pull it tight, and cut off the excess. Then, repeat the process panel to panel.
Wind tip: tie at every lug and corner, not just along the top edge. On a high-rise balcony, add a second row of ties midway down each panel so the foliage cannot lift or twist.
Solid metal and corrugated steel
For solid metal and corrugated steel, drive a metal screw with a washer through the panel every 10 inches.

Check that the vertical posts feel solid first. If they flex, add bracing poles before you hang anything (solid fences don’t need this). The washer spreads the load, so the screw head cannot pull through the panel backing. We’ve done this transformation of a metal fence more than once, and the key is good planning before commencing work.

On coastal buildings, we recommend corrosion-resistant stainless steel screws and washers, because salt attacks ordinary steel fixings first.
Timber railings and wood-framed balconies
Find the beams or structural members behind the railing and fix into them with wood screws or strong staples. A staple gun is quick, but on windy upper floors, we suggest screws because they hold better under repeated gusting.
Once you fix the panel securely, push on it to confirm it sits stable. This method works for timber, oak, pine and MDF.
Concrete, brick and masonry parapets
If you’re working with concrete, brick, or masonry surfaces, start by marking and leveling the area, then drilling holes for wall plugs, inserting the plugs, and fastening the panels with suitable screws.
You need a drill, a masonry drill bit, concrete anchor plugs, and a hammer. Fix to the parapet or wall face, and keep your drilling away from the slab edge and any waterproofing layer.
Stucco, plaster and plastic walls
Stucco, plaster, MDF, and plastic walls take a staple gun or a drill with screws. If your balcony wall is gypsum board, use plugs made for gypsum so the fixing does not damage the internal structure.
Our step-by-step stucco wall installation shows how you can easily manage this with everyday tools and a little bit of focus.
Glass balustrades
We do not drill or clamp through glass balustrades. Instead, fix panels to the metal posts separating the glass panes (if you have those). If not, we recommend building a freestanding frame, preferably made out of wood, and attaching the panels to that, as our team has done for many outdoor projects.

Alternatively, use a freestanding artificial hedge in a weighted planter in front of the glass as a double barrier.
Step-by-Step: Installing a Green Wall for Your Balcony
Whatever your railing, the sequence stays roughly the same:
-
Survey and mark. Measure the railing, mark the start and end points, and confirm you leave access points clear.
-
Fix the first panel. Use the method for your railing type above, starting at one end.
-
Snap the next panel on. Lay panels facing the same direction so the foliage flows naturally, then align the edges and press the clips into the lugs until you hear them click.
-
Continue along the run. Check that every joint is tight. Cut the final panel with scissors along the backing mesh so it fits your railing.
-
Check every fixing. Pull gently on each tie or screw. Add extra fixings wherever a panel moves or is a bit loose.
-
Fluff the foliage. Panels compress in the box during delivery for protection, so ruffle the leaves to restore their shape.
You can also download our full installation guide and keep it on your phone while you work so you can double-check your progress.
Where Balcony Green Walls Fail and How to Prevent It
Wind failures on balconies trace back to a short list of fixing mistakes. Thanks to our decades of experience, we’ve learned to plan around each one of them so that we can help you along if you’re DIY-ing:
-
Too few fixing points. Panels tied only along the top edge flap and twist. You need to fix at every lug and corner, then add a mid-panel row on upper floors.
-
A weak surface behind the fixing. Plugs in crumbling plaster or screws in hollow timber pull out first. Make sure to fix the panels into beams, solid masonry, or the correct gypsum plugs.
-
Unbraced posts. A flexing post moves the whole wall. Focus on bracing the posts before you hang the first panel.
-
Loose panel joints. Panels that are not clipped together move independently. Snap every clip and lug, then check each joint.
-
Corroded or sun-damaged hardware. In coastal areas, salt weakens ordinary steel screws, and sun degrades cheap ties. We recommend using stainless steel screws and washers and UV-stable ties, and inspecting them regularly for signs of damage
-
Overhang. Panels that stick out past the railing catch wind from the side. We keep panels inside the railing line and trim the last panel to fit.
Coastal Balconies: Salt, Sun and Storm Season
Almost 40% of Americans live in coastal areas, according to NOAA, and balconies there deal with salt on top of wind. Salt residue builds up on leaves and fixings, so you’ll need to rinse your green wall gently about once a month.
After heavy storms or high winds, inspect the panels, rinse off extra salt deposits and dry the foliage with a microfiber cloth. Our guide to maintaining artificial green walls in coastal regions walks through the full routine, and our cleaning page covers the technique.
Every few months, look for tears, loose ties, and any rust around your screws and washers, and fix the problems before they’ve caused an issue.

The sun is the other coastal factor. Our UV-protected outdoor greenery resists fading, and keeping in mind our tips on keeping artificial plants from fading outside can help if you already own panels without much UV protection.
Unlike salt and sun, storm season needs a concrete plan. Ask your building whether it has hurricane prep rules for balcony items, and remember that warranties do not cover extreme events like hail or floods. We explain how artificial greenery handles storms and sun in more detail, but we suggest gleaning information directly from your landlord, property owner, or building inspector.
Finishing Thoughts
Now that you know what you can (or can’t) solve with a balcony green wall, it’s time to think about whether this decor option is a good choice for your space. While we’re biased, we think there’s no better way to breathe more life into an outdoor space than with a low-maintenance green wall, and thousands of clients can attest to that.
Every balcony differs by height, railing, and exposure. Tell us yours, and we’ll help you choose the fixing method, the panels, and the quantity that suit it.
Book your free consultation by calling us on +1 786 723 3309, or visit a warehouse showroom in Medley, Florida or Temecula, California, by appointment.
If you’re ready now, shop our balcony-ready green wall panels and start installing this weekend.
FAQs
-
Can I attach a green wall to a balcony railing?
-
Yes, as long as the railing is structurally sound and your building allows it. Match the method to the railing: cable ties for mesh and tubular, screws with washers for solid metal, wood screws for timber, and wall plugs for masonry. If you’re unsure, ask us before you start.
-
Will wind pull a balcony green wall off?
-
Winds won’t pull your balcony green wall off if you’ve installed it correctly and securely. To make sure this doesn’t happen, secure every lug, fix into a solid surface, use UV-stable ties or stainless hardware, and add extra fixing points wherever needed.
-
Can I put a green wall on balcony glass railings?
-
We never drill or clamp through glass. Fix to the solid wall behind it or use a freestanding frame or planter-based hedge in front of the glass instead.
-
How do I cut panels to fit my balcony?
-
Cut the excess off with scissors along the backing mesh. Cut the last panel in each run, then check it still clips tightly to its neighbor.
-
How much maintenance does a balcony green wall need?
-
Very little. Dust it occasionally with a dry cloth or compressed air, and avoid abrasive products or high-pressure water. On the coast, add a gentle monthly rinse with fresh water.