So you’ve got a vinyl fence that’s been begging for some attention?
Think there’s no easy way out except to hang random decorations on it?
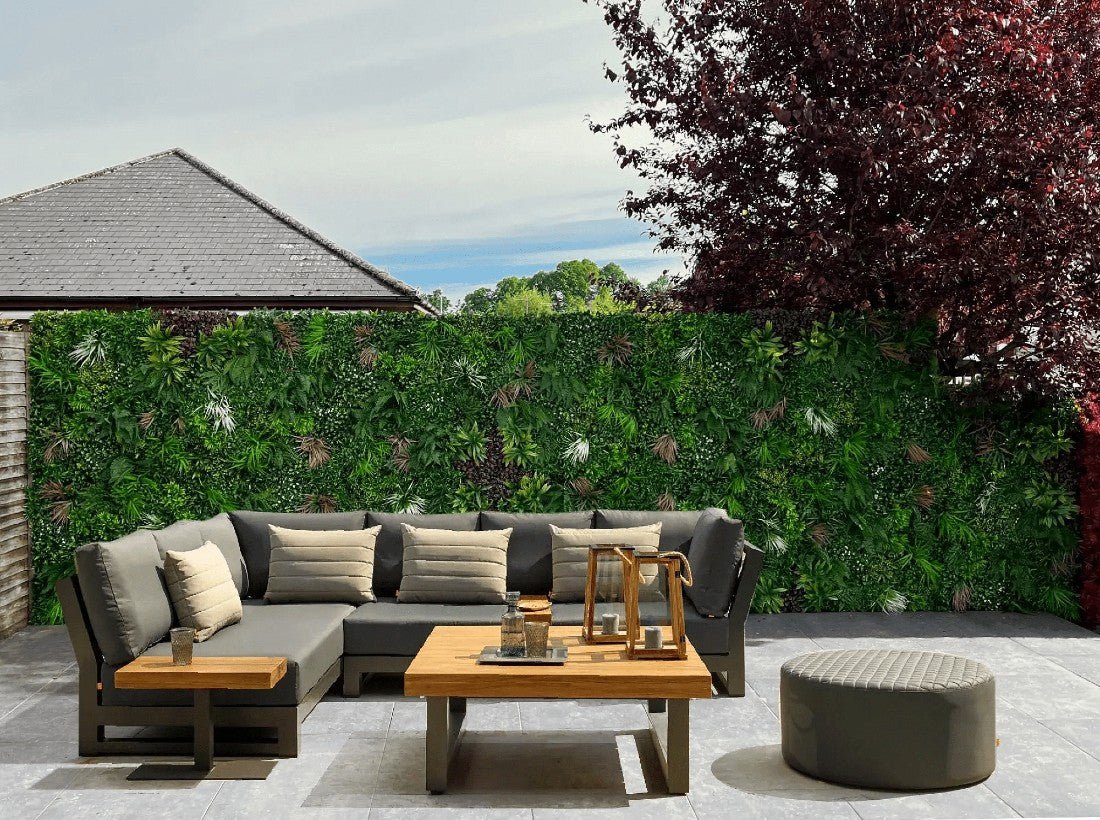
Well, let us introduce you to a smarter, more stylish solution: installing artificial green walls. Trust and believe that the hassle of hanging up individual decorations won’t cross your mind ever again.
We’re here to guide you through the simple process of attaching faux greenery to your vinyl fence.

It’s a piece of cake, we promise you that.
But before we get into it, we’ll talk about what vinyl fencing is. Then, we’ll discuss how to install a faux green wall on it.
What Is Vinyl Fencing?
Vinyl is a type of synthetic material made from ethylene and chlorine, which when combined, create polyvinyl chloride (PVC). This material is a durable, flexible, and low-maintenance option for fencing due to its resistance to moisture and corrosion.
You can find vinyl everywhere - pipes, tubing, flooring, siding, clothing, fencing, etc. Its popularity mainly stems from its ability to mimic the appearance of natural materials while enhancing longevity and durability.
Vinyl is a fantastic option for fencing because it’s stronger than wood, making it ideal for states with extreme and unpredictable weather. Its appeal also lies in its versatility, as it suits different architectural landscaping preferences. It offers a clean, polished appearance to your property and requires minimal maintenance over time.
And as a bonus, you can easily attach an artificial green wall to it and make it virtually indistinguishable from a living fence.
How to Attach Faux Green Walls to a Vinyl Fence?

Attaching a fake vertical garden to a vinyl fence isn’t much different from other types of surfaces. It’s a straightforward process that doesn’t call for much other than some screws, washers, and tape measure.
When you first receive your Designer Plants premium artificial green walls, you’ll notice they’re compacted and flat in the box. We do this to ensure they don’t get damaged during delivery and arrive fit and healthy.
Take the faux green wall panels out of the box, put them in your work area, and grab your screws and washers. Starting from the top corner of your vinyl fence, position the first panel and secure it in place with a screw and washer combination. Remember to mind the arrows on your panel so that it hangs the right way. As you affix the screw, make sure the head of the screw and the washer firmly grab the backing of the artificial living wall panel.
Repeat this process every 10 to 15 inches along the panel’s perimeter for even and secure attachment. You’re going to need some measuring for this, so don’t forget your tape measure.
Once the first panel is in place on your vinyl fence, connect the next panel by clipping it to the first one using the plugs on the back. Repeat these steps for all the other panels until you achieve your desired coverage.
In the end, fluff the foliage and make sure it covers the grid on the back and enjoy the view.
To recap the process, here’s a step-by-step:
Step 1:Gather your faux living wall panel, screws, washers, and tape measures.
Step 2:Hold the panel against the vinyl fence and mind the arrows.
Step 3:Start at the top corner of the fence.
Step 4:Affix the first panel to the top corner and secure it in place with screws.
Step 5:Screw them in every 10 to 15 inches.
Step 6:Clip the next panels to the previous one.
Step 7: Repeat the steps for the next panels until you’ve covered the entire fence.
Finishing Thoughts
Now, it’s time to step back and admire your new and improved vinyl fence. You did it all by yourself and deserve a round of applause!
Attaching artificial green walls is easy to do on any surface, which is why we encourage you to try to do the job yourself. Not only will you feel ownership over the project, but you’ll fill your free time up productively and build new skills.
Need help picking the best artificial plant for your space? Take this short quiz.